

“This is the written account of the descendants of Adam. When God created human beings, He made them to be like Himself. He created them male and female, and He blessed them and called them ‘human’ .”
Main Source: Practical SQL: A Beginner’s Guide To StoryTelling With Data by Anthony Debarros (2nd Edition). [Amazon Link]
However, this post HAS variations to the above mentioned text.
This post will focus on creating our first table in PostgreSQL using the GUI tool pgAdmin.
Post #3 builds off the previous post, which created the database testingthisout.
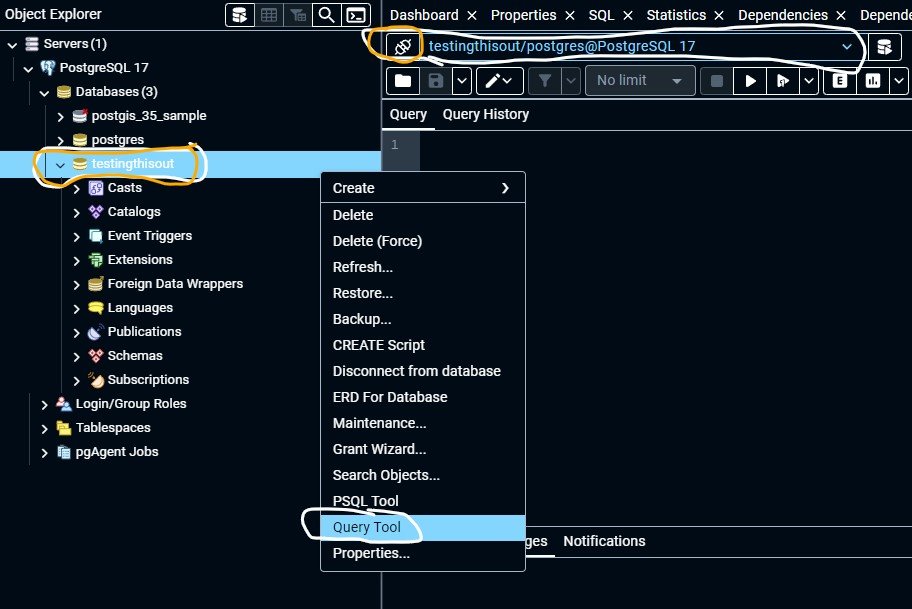
Step 1: Make sure pgAdmin is connecting to the testingthisout database.
*** Check the areas circled in white.
Creating a Table will help us define relationships between data.
If you do not see the Query & Query History menu, then by right-clicking the “testingthisout” database, you should see a menu with the “Query Tool” option (as shown above, circled in white). Click this option.
Step 2: So now, we will create a table: Copy this code into your Query.
(The code below has several errors & will produce an error message. See if you can spot the error).
CREATE TABLE administration (
	id bigserial,
	first_name varchar(21)
	mid_int_name varchar (1)
	last_name varchar(21)
	school_name varchar(49)
	date_of_hire date
	salary_current numeric
);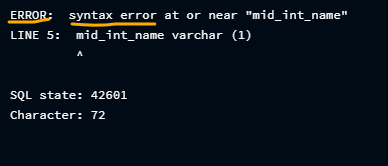
What is the deal?
Well, it turns out . . . that we are missing commas. These commas should be inserted after each column. So let’s make the changes we need.
Here is the updated CORRECT code:
***Here is another post, describing what is happening within this code & what the datatypes mean.
CREATE TABLE administration (
	id bigserial,
	first_name varchar(21),
	mid_int_name varchar (1),
	last_name varchar(21),
	school_name varchar(49),
	date_of_hire date,
	salary_current numeric
);
If this Query was run correctly, you should get a similar message:

??? Is There A Way To See The Table Within The Object Explorer ???
YES!
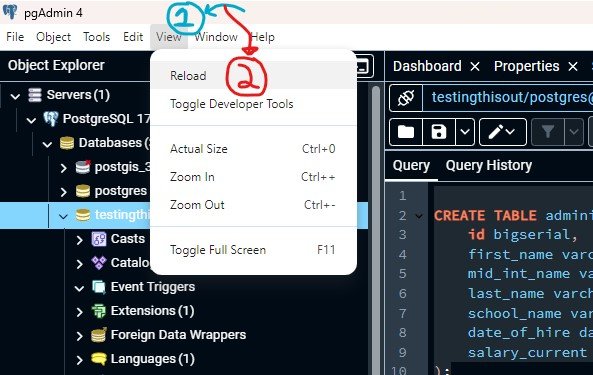
To do that, we need to “reload” Object Explorer. If you recall from Post#2, we want to click the “View” menu at the top of pgAdmin 4, and then hit “reload”.
Now, after hitting “reload” on the “View” menu (as described above), go to your Object Explorer menu.
Make sure your drop-down menu items: “Servers”, “PostgreSQL 17”, “Databases”, and “testingthisout” are all open.
(The arrow should point down)
It should look similar to this:
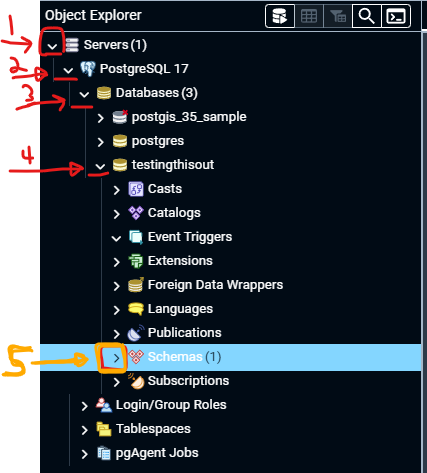
Now, click the arrow for “Schemas” (#5 above) so that it points down.
#6, below is the result.
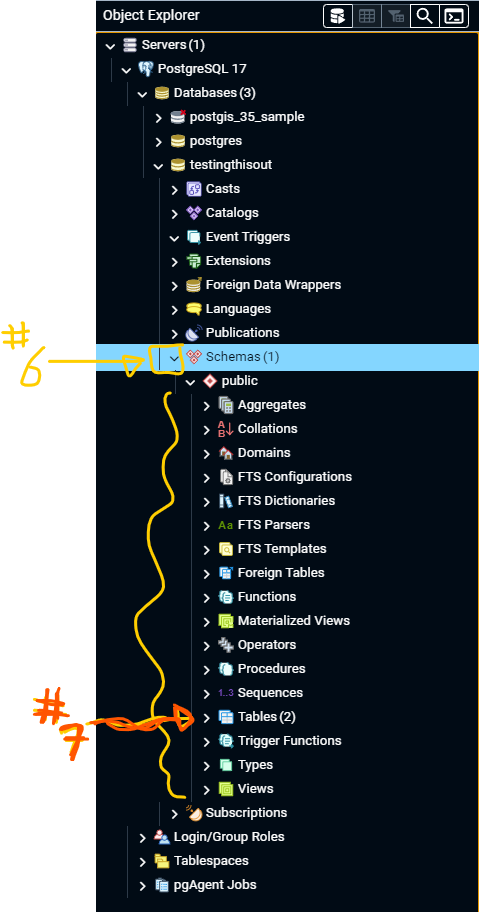
Next, we will click the (#7) “Tables” menu, but yours might only have “Tables (1)” which is okay, as we have only made one table.
I made another table previously that is not documented on this post!!
After opening “Tables”, open “administration” (#8) below.
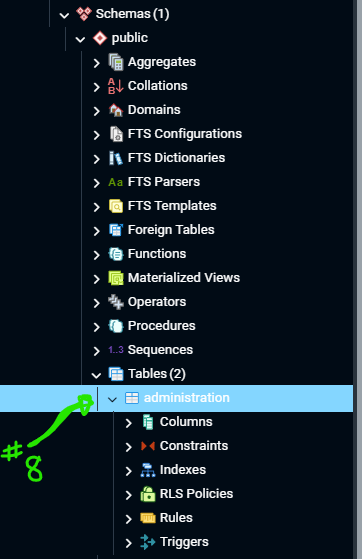
Let’s take a look at the “Columns” within our “administration” table.
After opening the “administration” menu, open “columns” to see a list of the column names we created with our code.
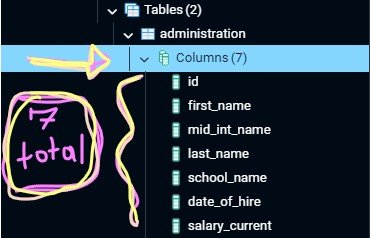
There should be 7 Columns: (1) id, (2) first_name, (3) mid_int_name, (4) last_name, (5) school_name, (6) date_of_hire, (7) salary_current.
Post #4 will go into more detail about the datatypes utilized in PostgreSQL & the code utilized to create the “administration” table in this post.
Post #5 will explain how to add rows of information to the “administration” table that we created in this post.
“This is the written account of the descendants of Adam. When God created human beings, He made them to be like Himself. He created them male and female, and He blessed them and called them ‘human’ .”
Leave a Reply