
Psalm 119:105 (NKJV) –
“Your word is a lamp to my feet & a light to my path”
This post will primarily focus on the installation of PowerShell using Winget/CLI on Windows 11.
First off, there is a difference between (1) Windows PowerShell & (2) PowerShell.
(1) Windows PowerShell is the version of PowerShell that ships with the Windows OS, uses the full .NET Framework, and is no longer being supported by Microsoft with new features. The .NET Framework only runs on Windows OS.
(2) PowerShell is built with .NET & not on the .NET Framework, therefore PowerShell can be run on Windows, Linux, and macOS.
The PowerShell scripting language has the following features:
- Extensible through functions, classes, scripts, and modules
- Extensible formatting system for easy output
- Extensible type system for creating dynamic types
- Built-in support for common data types like CSV, JSON, and XML.
- Accepts & returns .NET objects rather than text.
PowerShell has modules to deploy & manage technologies like:
- Microsoft Azure
- Microsoft Windows OS (active directory)
- Microsoft Exchange
- SQL
- AWS
- VMWare
- Google Cloud
In PowerShell, administrative tasks are mainly performed using cmdlets (command-lets), which are classes (in .NET) that implement specific operations.
These cmdlets are native pre-installed PowerShell commands, not stand-alone executables. Cmdlets can be written in any compiled .NET language (C#, F#, VB) or in PowerShell scripting language.
Cmdlets are named using a Verb-Noun pair (Get-Command // Get-Process // Get-Command).
Who Uses PowerShell?
Traditionally, PowerShell was utilized by System Administrators. Today, PowerShell is utilized by those in DevOps, Cloud Ops & Developers.
Installing PowerShell using Winget on Windows 11.
Winget, is a command-line tool that helps users install/upgrade/remove and configure applications on a Windows client computer. Winget is the client interface of the Windows Package Manager service.
Winget comes bundled with modern version of Windows 10 & Windows 11, however it is not available on Windows Server 2022 or earlier versions.
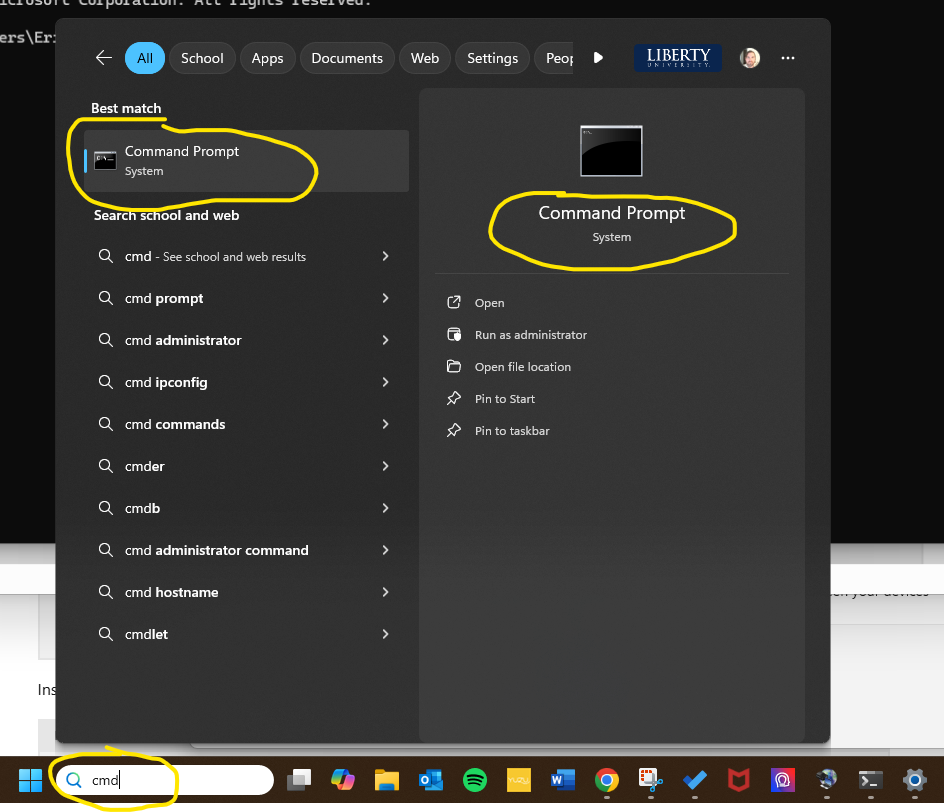
(1) Open the Command-Line Interface [CLI] by typing in “cmd” on Windows Search.
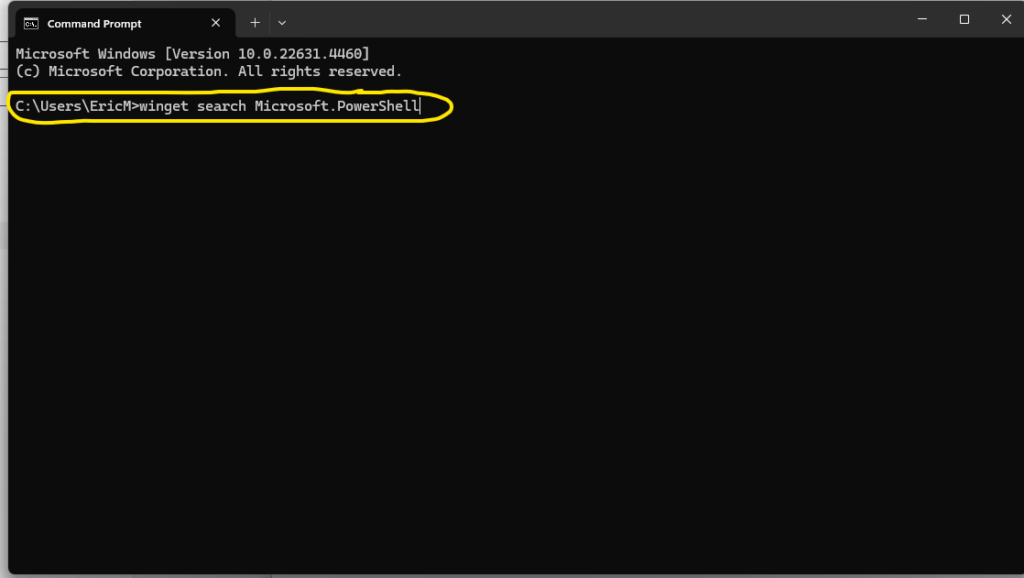
(2) Type in “winget search Microsoft.Powershell” into the CLI.
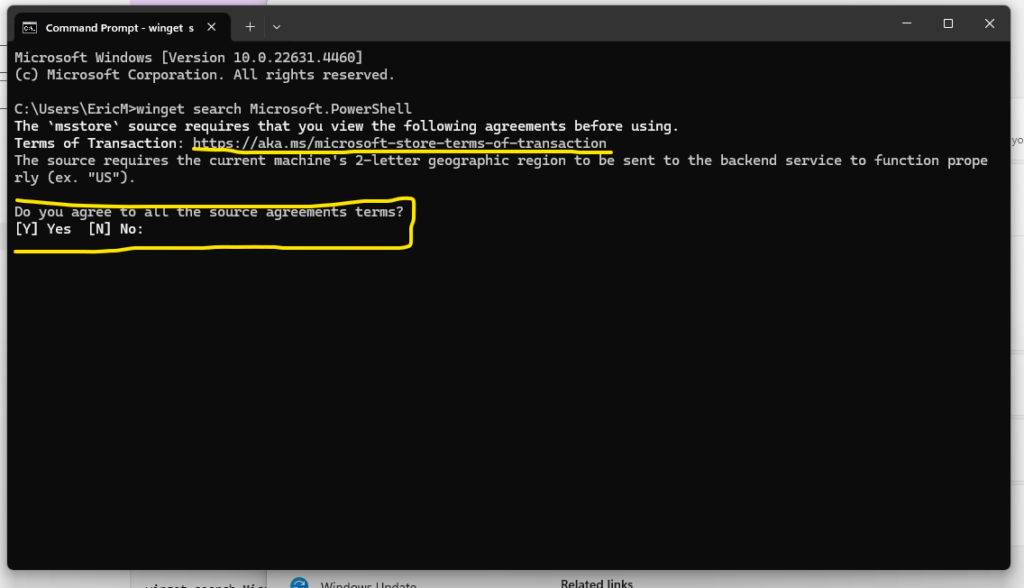
(3) Read & Agree to the Terms of Transaction, after clicking on the link.
I would not rush this step, as you are signing a binding arbitration clause & waiving your rights to a class action lawsuit in Section 27 of the agreement.
Section 27: States that after 60 days of informal resolution attempts, then a neutral arbitrator, under the American Arbitration Association following the rules of the Federal Arbitration Act, will be selected. What this neutral arbitrator decides will be final (“binding”) except for a limited right of review under the FAA. Read the subsections (a)-(g) to develop a deeper understanding.
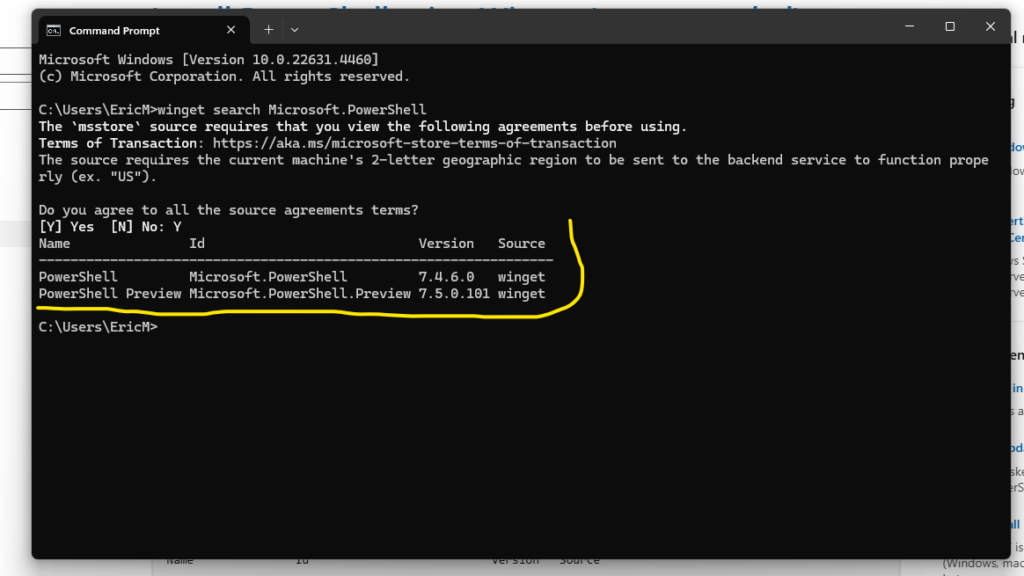
(4) After you agree to the terms, your CLI should look similar to this:
(5) Install PowerShell with this command “winget install –id Microsoft.PowerShell –source winget”
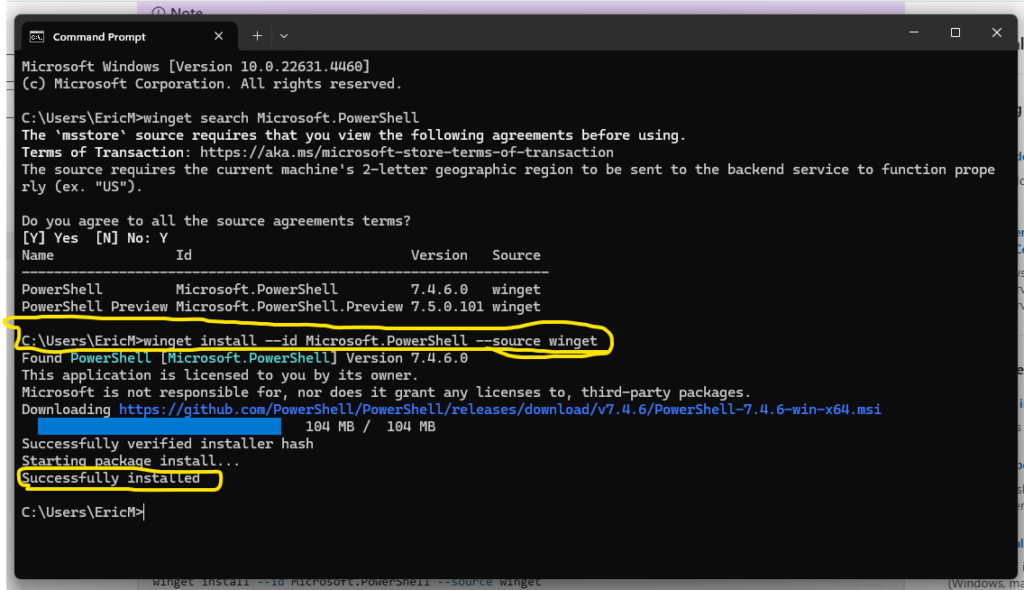
(6) Celebrate your successful installation of PowerShell !!!
(7) In the next few posts, I will document my learning experiences with .NET & the PowerShell scripting language within the Windows environment.
Leave a Reply